How to Choose the Right Tiles for Your Bathroom Renovation
Renovating a bathroom is an exciting endeavor that can significantly enhance the functionality and aesthetics of one of the most used spaces in your home. Among the numerous decisions you’ll make during this process, selecting the right tiles is one of the most critical.
Tiles play a crucial role not only in the visual appeal of your bathroom but also in its durability and maintenance. This comprehensive guide will help you navigate the world of bathroom tiles, providing detailed insights and recommendations to ensure you make the best choices for your renovation project.
Understanding Tile Types
The first step in choosing the right tiles for your bathroom is understanding the various types available. Each type has its unique characteristics, advantages, and ideal applications.
1. Ceramic Tiles
Ceramic tiles are made from clay and other natural materials, then fired in a kiln. They are versatile, affordable, and come in a wide range of colors, sizes, and styles.
– Pros: Durable, water-resistant, easy to clean, affordable.
– Cons: Can chip or crack if not installed properly, not as durable as some other materials.
– Best For: Walls, floors, and backsplashes.
2. Porcelain Tiles
Porcelain tiles are a type of ceramic tile but are made from finer, denser clay and fired at higher temperatures. This makes them more durable and water-resistant.
– Pros: Highly durable, water-resistant, low maintenance, available in many designs.
– Cons: More expensive than standard ceramic tiles, can be difficult to cut and install.
– Best For: Floors, walls, high-moisture areas like showers.
3. Glass Tiles
Glass tiles are made from thin pieces of glass with a translucent glaze on the back. They add a sleek, modern look to any bathroom.
– Pros: Non-porous, resistant to stains, easy to clean, highly reflective (adds light to the room).
– Cons: Can be slippery when wet, more expensive, requires careful installation to avoid breakage.
– Best For: Backsplashes, accent walls, shower walls.
4. Stone Tiles
Natural stone tiles include materials like marble, granite, limestone, and slate. Each type of stone has unique veining and patterns, adding a touch of luxury to your bathroom.
– Pros: Unique, natural beauty, durable, adds value to your home.
– Cons: Expensive, requires sealing to prevent stains, can be slippery, and heavy.
– Best For: Floors, walls, accent areas.
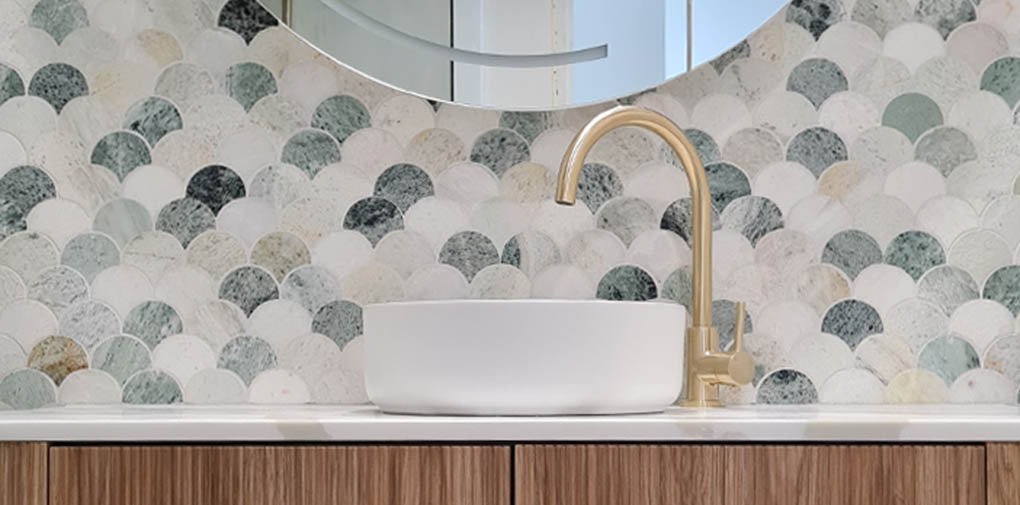
5. Mosaic Tiles
Mosaic tiles are small tiles, often made from ceramic, porcelain, glass, or stone, arranged in a pattern or design. They can be used to create intricate designs and add visual interest.
– Pros: Versatile, great for creating detailed patterns, easy to install on curved surfaces.
– Cons: Can be more labor-intensive to install, grout lines can be difficult to clean.
– Best For: Backsplashes, accent walls, shower floors.
6. Vinyl Tiles
Vinyl tiles are a budget-friendly option that has improved in quality and appearance over the years. They are made from synthetic materials and can mimic the look of more expensive tiles.
– Pros: Affordable, water-resistant, easy to install, comfortable underfoot.
– Cons: Less durable than other materials, can be damaged by sharp objects.
– Best For: Floors, especially in budget-friendly renovations.
Determining Your Tile Needs
Before you start shopping for tiles, it’s essential to determine your specific needs. Consider the following factors:
1. Area of Application
– Floor Tiles: Need to be durable, water-resistant, and slip-resistant.
– Wall Tiles: Can be less durable than floor tiles but should still be water-resistant.
– Shower Tiles: Must be highly water-resistant and easy to clean.
2. Style and Aesthetics
– Overall Look: Decide on the overall style you want to achieve (modern, traditional, rustic, etc.).
– Color Scheme: Choose colors that complement the rest of your bathroom decor.
– Pattern and Texture: Consider whether you want plain tiles, patterned tiles, or textured tiles.
3. Durability and Maintenance
– Traffic Level: Consider how much use the bathroom gets. High-traffic bathrooms need more durable tiles.
– Maintenance: Think about how much time you’re willing to spend on cleaning and maintenance.
4. Budget
– Material Cost: Different types of tiles vary significantly in price.
– Installation Cost: Some tiles are more labor-intensive to install than others.
Tips for Choosing the Right Tiles
Now that you have a good understanding of the types of tiles and your specific needs, here are some practical tips to help you choose the right tiles for your bathroom renovation:
1. Start with a Focal Point
Choose a focal point in your bathroom, such as the shower, a feature wall, or the floor. Select a standout tile for this area and build the rest of your tile choices around it.
2. Mix and Match
Don’t be afraid to mix and match different types of tiles. For example, you can use porcelain tiles on the floor for durability and glass tiles on the walls for a sleek look.
3. Consider Tile Size
Larger tiles can make a small bathroom feel bigger, while smaller tiles can add texture and interest. Consider using large tiles on the floor and smaller tiles for accents or mosaics.
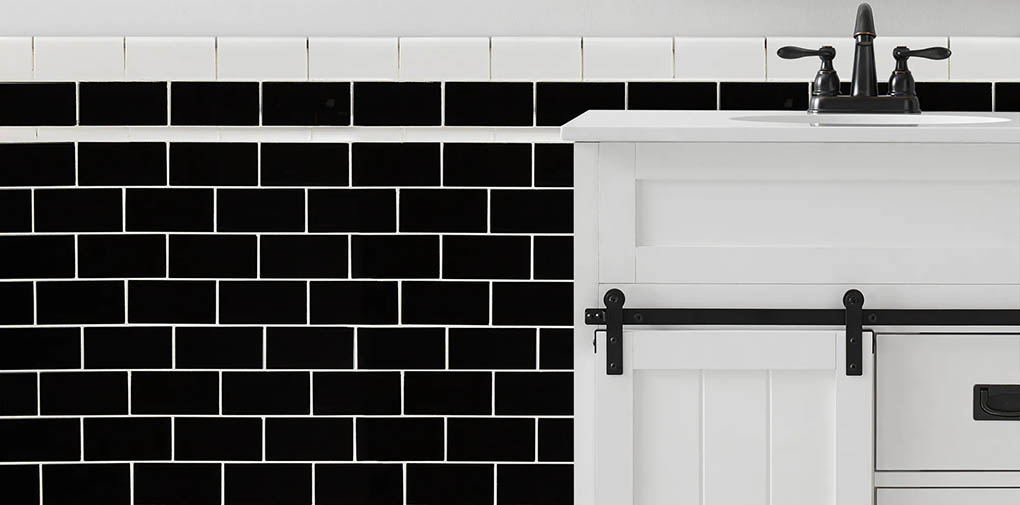
4. Think About Grout
The color and width of the grout lines can significantly impact the overall look of your tiles. Dark grout can hide stains but may make the tiles look smaller, while light grout can make tiles pop but requires more maintenance.
5. Test Samples
Before making a final decision, bring home tile samples and see how they look in your bathroom’s lighting. This can help you avoid any surprises once the tiles are installed.
6. Prioritize Safety
For floor tiles, especially in the shower, choose tiles that are slip-resistant to prevent accidents.
7. Future Proof Your Design
Choose tiles that will stand the test of time in terms of both durability and style. Classic designs and neutral colors often age better than trendy patterns and bold colors.
Recommended Tile Products
To help you get started on your bathroom renovation, here are some highly recommended tile products:
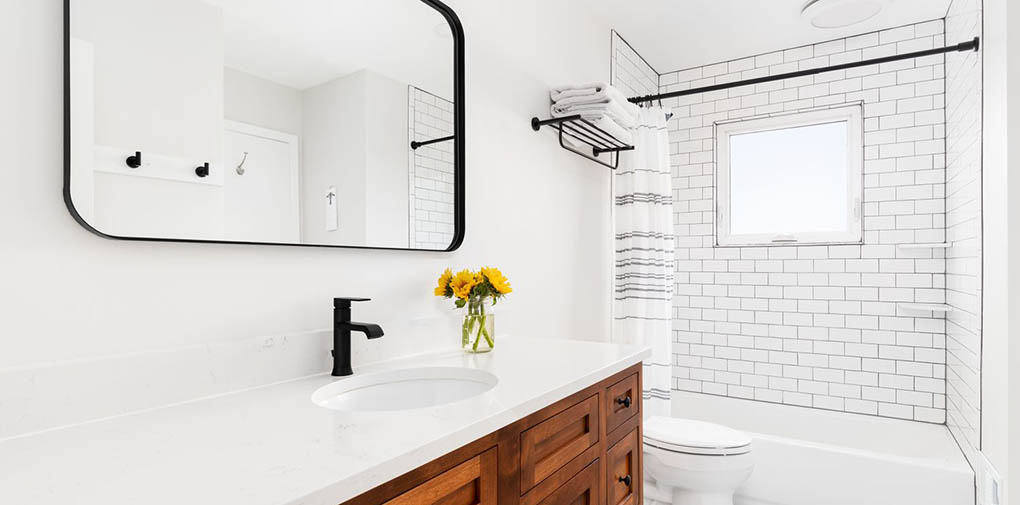
1. Daltile Rittenhouse Square 3″ x 6″ Ceramic Subway Tile
– Description: Classic subway tiles that offer a clean, timeless look. Perfect for walls and backsplashes.
– Pros: Affordable, easy to clean, versatile.
– Cons: Requires more grout lines which can be harder to clean.
– Best For: Walls, backsplashes.
– Price Range: $2-$3 per square foot.
2. MSI Stone ULC White Hexagon Porcelain Mosaic Tile
– Description: Elegant hexagon mosaic tiles that add a unique touch to any bathroom.
– Pros: Slip-resistant, durable, stylish.
– Cons: More expensive, requires careful installation.
– Best For: Floors, shower floors.
– Price Range: $10-$15 per square foot.
3. American Olean Bright White Ice Ceramic Wall Tile
– Description: Bright white ceramic tiles that create a fresh, clean look.
– Pros: Affordable, easy to install, brightens up the space.
– Cons: Can show dirt and grime more easily.
– Best For: Walls.
– Price Range: $1-$2 per square foot.
4. Marazzi Montagna Wood Vintage Chic Porcelain Floor and Wall Tile
– Description: Porcelain tiles that mimic the look of wood, adding warmth and texture.
– Pros: Durable, water-resistant, realistic wood look.
– Cons: Can be slippery when wet.
– Best For: Floors.
– Price Range: $3-$5 per square foot.
5. Glass Tile Oasis Subway Glass Tile
– Description: Sleek and modern glass tiles that add a touch of elegance.
– Pros: Reflective, easy to clean, stylish.
– Cons: Can be slippery, more expensive.
– Best For: Backsplashes, accent walls.
– Price Range: $10-$20 per square foot.
Installation Considerations
Choosing the right tiles is just the first step. Proper installation is crucial to ensure the longevity and appearance of your tiles. Here are some key considerations:
1. Professional vs. DIY Installation
– Professional Installation: Hiring a professional ensures a high-quality finish, especially for complex tile patterns and materials like stone or glass.
– DIY Installation: If you have experience and confidence, installing tiles yourself can save money. However, it’s essential to follow best practices and take your time to achieve a good result.
2. Preparation
– Surface Preparation: Ensure the surface is clean, dry, and level before starting the installation. Any imperfections can affect the final look and durability of the tiles.
– Layout Planning: Plan your tile layout before starting to avoid awkward cuts and ensure a balanced design.
3. Adhesive and Grout
– Choosing the Right Adhesive: Different tiles require different adhesives. For example, use thin-set mortar for ceramic and porcelain tiles and epoxy-based adhesive for glass tiles.
– Grout Selection: Choose a
grout that complements your tiles and consider sealing it to prevent stains and moisture penetration.
4. Cutting Tiles
– Tile Cutter: Use a manual tile cutter or wet saw for straight cuts. For more intricate cuts, a tile nipper or rotary tool may be necessary.
– Safety: Always wear safety goggles and gloves when cutting tiles to protect yourself from sharp edges and debris.
5. Maintenance and Care
– Sealing: Natural stone tiles should be sealed to prevent stains and moisture damage. Some ceramic and porcelain tiles may also benefit from sealing.
– Cleaning: Use mild, non-abrasive cleaners to keep your tiles looking their best. Avoid harsh chemicals that can damage the tiles or grout.
– Regular Maintenance: Inspect your tiles regularly for signs of damage or wear and address any issues promptly to maintain the integrity and appearance of your bathroom.
Choosing the right tiles for your bathroom renovation is a critical decision that involves considering various factors such as the type of tile, area of application, style, durability, and budget.
Remember to consider the practical aspects of tile selection, such as slip resistance for floors and water resistance for shower areas. Mixing and matching different types of tiles can create a unique and personalized look, while also addressing the specific needs of each area in your bathroom.
Finally, proper installation and maintenance are essential to ensure the longevity and appearance of your tiles. Whether you choose to hire a professional or tackle the installation yourself, taking the time to prepare and plan will pay off in the long run.